If you’ve ever worked in construction, manufacturing, or even boat rigging, you know a lifting chain isn’t just a bunch of metal links strung together—skip a step when assembling it, and you’re asking for trouble. As a lifting chain supplier, I’ve seen my fair share of botched assemblies that could’ve been avoided with a little know-how (and a lot of patience). Today, I’m breaking down exactly how to assemble a lifting chain the right way, no fancy tools or engineering degree required. Let’s dive in.
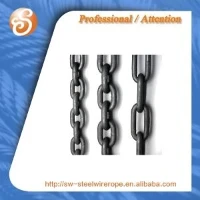
First off, let’s get one thing straight: not all chains are made equal. If you grab any old steel chain link chain from the hardware store, you’re setting yourself up for failure. For lifting, you need gear that’s built to take a beating—literally. The most common types folks reach for are G80 STEEL Chain and DIN 5685A Short Link Chain, but choosing the right one depends on your load and environment. I always tell new clients: figure out your working load limit (WLL) first, then match your chain to that number.
Let’s start with the basics of what you’ll need for assembly, because showing up empty-handed is a rookie move. Here’s my go-to kit, no hidden stuff:
- The actual lifting chain (obviously). If you’re not sure which kind to get, check our Lifting Chain page for all the specs—we stock everything from heavy-duty G80 for industrial lifts to lighter DIN 5685A for smaller jobs.
- Connecting links (sometimes called master links or coupling links—don’t mix these up with the regular chain links, they’re thicker for loads).
- A pair of heavy-duty bolt cutters or a chain cutter (manual works for small jobs, but a hydraulic one is way easier if you’re dealing with thick G80 chain).
- A set of locking pliers (to hold links tight while you work—wobbly chains equal unsafe chains).
- A small wire brush (you’ll thank me later when you’re not fighting rust or grease during assembly).
Wait, quick safety note before we start: never assemble a lifting chain that’s damaged. If you see cracked links, bent parts, or rust that’s flaking off, trash it. Even a tiny flaw can snap under load, and that’s a disaster. I once had a client bring in a chain he’d been using for months with a kink in one link—turns out it was a hairline crack, and it almost dropped a 2,000-pound beam. Don’t be that guy.
Okay, let’s get to the actual assembly steps. I’m gonna walk you through the most common scenario: putting together a custom-length lifting chain using DIN 5685A Short Link Chain (great for general lifting) and a connecting master link. This works for most jobs, but if you’re working with galvanized stuff (like DIN 5685-C Galvanized Long Link Chain for outdoor use), the steps are almost identical—just watch for any loose galvanized flakes while you clean.
Step 1: Measure twice, cut once. I can’t stress this enough. Nothing’s worse than cutting a 10-foot chain and realizing you needed 9.5 feet. Grab your tape measure and mark exactly where you need to cut the chain on two separate links. Pro tip: leave a little extra (like 6 inches) for adjusting connections later—you can always cut more off, but you can’t glue it back on. If you’re using a new chain from our site, it’ll come coiled, so stretch it out first to avoid kinks before you measure.
Step 2: Cut the chain to length. Grab your chain cutter and set it to your marked spot. If you’re using bolt cutters for smaller links, make sure the jaws line up perfectly with the link’s weld—cutting at an angle will leave a sharp edge that can fray the connection. For G80 STEEL Chain (thicker, heavier), a manual cutter might not do the trick—grab a hydraulic one, it’ll save you 10 minutes of grunting and sore arms. Once you cut, use your wire brush to clean the cut ends—get rid of any metal shavings or burrs. Those little bits can get caught in the connecting link and weaken the whole assembly.


Step 3: Attach the connecting link. This is the most important part—don’t rush it. First, open the master link. Most connecting links have a small bolt or a spring-loaded pin you’ll need to twist or push to loosen. Take one end of your cut chain and feed it through one side of the master link. Then take the other end of the chain and feed it through the other side. Make sure both chain links are sitting fully inside the master link, not sticking out. If you’ve got a locking pin, slide that into the master link and tighten it down—use pliers to make it snug, but don’t over-tighten to the point you can’t open it again later. Here’s a check: wiggle the chain hard—if the connecting link moves or feels loose, you missed a step. Stop and fix it.
Step 4: Test for tension (the no-load test, at least). Once you’ve got the two ends connected, pull the chain tight by hand. It should lay straight, no twists or kinks. If you see a twist, undo the master link, flip one chain end, and reattach it—twisted chains can cause uneven loading and make the whole thing fail under a heavy load. I always do this test twice, even if it looks right the first time.
Wait, what if you’re not using a master link? For smaller jobs, some people use separate steel chain link chain to connect links, but master links are way safer for lifting. I’ve seen guys try to twist links together with pliers, and that’s a recipe for disaster—those connections aren’t as strong as a factory-made master link, and they can snap without warning. Stick to the master links meant for lifting, okay?
Now, a few pro tips from someone who’s assembled hundreds of these (and fixed a few bad ones):
- If you’re working with DIN 5685-C Galvanized Long Link Chain, don’t use a wire brush that’s too rough—you’ll wear off the galvanized coating and make it rust faster. A soft-bristle brush works better here.
- For G80 STEEL Chain, once you connect the master link, you can use a small hammer to tap the bolt on the master link to make sure it’s seated all the way. Just don’t hit it so hard you bend the link.
- Never use a welded link connection for critical lifts. Welds can be inconsistent, and if the welder missed a spot, you won’t know until it’s too late. Master links are tested to meet safety standards, so that’s the way to go.
- Keep a few extra connecting links on hand. If you’re working on a big job and one gets bent or lost, you don’t wanna have to run to the store mid-project. Our Lifting Chain page has all the compatible master links, so you can order extras ahead.
Let’s talk about a common mistake I see all the time: ignoring load limits. Just because you assembled a lifting chain doesn’t mean it can lift anything you hook to it. Every link and master link has a WLL, and you need to make sure the combined WLL of the whole chain is enough for your load. For example, a G80 chain link has a higher WLL than a standard DIN 5685A link, so mixing them is a no-no. If you have questions about which chain is right for your load, just reach out—we’re here to help.
Another thing: don’t assemble a lifting chain near heat or open flames. Wait until the chain is cool before you cut or connect links. Even a small weld or torch can weaken the steel, making the whole chain unsafe. I learned this the hard way—once I assembled a chain right next to a welding torch, and a link snapped a week later because the heat messed with its strength. Lesson learned.
Now, let’s wrap up with how to inspect your assembled chain before you use it. This is non-negotiable. Do a quick check:
- All links are straight, no bends or cracks.
- The master link is tightened all the way, no loose bolts.
- No twists or kinks in the chain.
- No sharp edges or burrs from cutting.
If all that checks out, it’s good to go. If not, take it apart and fix it—don’t take chances.
At the end of the day, assembling a lifting chain isn’t brain surgery, but it’s also not something you should half-ass. Safety is everything here—your crew, your equipment, and whatever you’re lifting are counting on it. If you need more info on choosing the right chain (like G80 STEEL Chain for heavy industrial lifts or DIN 5685A Short Link Chain for light general jobs), head to our site. We’ve got all the specs and guides to help you get it right the first time.
If you’ve got questions about your specific lift, need help picking the right parts, or want to order quality lifting chain, get in touch with our team. We’re not just a supplier—we’re here to make sure your lifts are safe, every single time.
References
"Understanding Working Load Limits for Lifting Equipment." Occupational Safety and Health Administration (OSHA), 2022.
"Specification for Welded Steel Link Chains for Lifting Purposes." American Society of Mechanical Engineers (ASME), 2021.
"DIN 5685 Standard for Short Link Chains." Deutsches Institut für Normung (DIN), 2019.